video1: FollowBot overview
Overview:
The aim of Project FollowBot was to build an autonomous robot that could follow a person around a house. We wanted to build a prototype while investigate current autonomous robot tracking technologies and limitations.
An autonomous tracking robot could have many uses, including:
- Search and rescue.
- Following you with your luggage through an airport.
- Pushing a shopping trolly behind you.
- Helping disabled people carry items around their house.
- Following children with a basket while they clean up toys.
Videos
video2: left/right movement with object tracking onboard the raspberry pi
video3: independent camera tracking onboard the robot
Project Details:
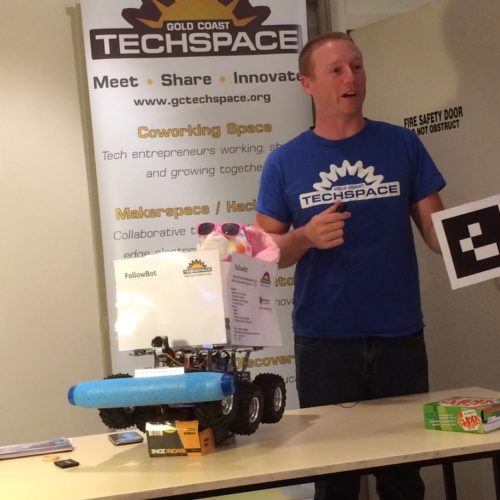
- Members: David Baker ([email protected])
- Goal: Create a robot that can follow an object (person or bike) over moderate terrain using a camera as the tracking method. The robot can have a basket on top to carry tools, supplies or equipment.
- Biggest Challenge: Creating an object tracking algorithm that will run quick enough on the low powered onboard Raspberry Pi3 hardware.
- Total Budget: $652 AUD
- Total Time: 4-12 hours a week over a 13 week period
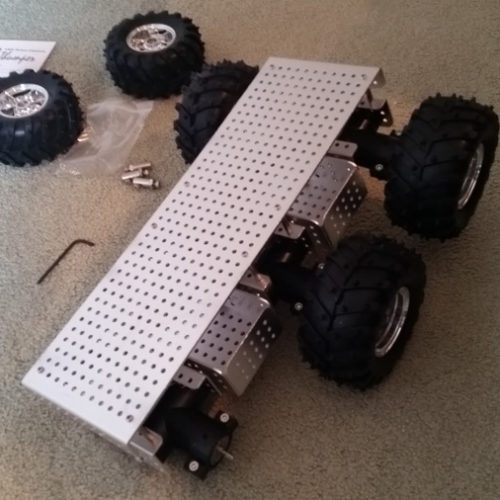
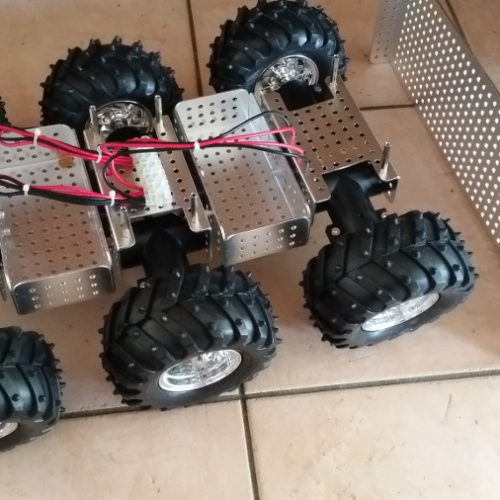
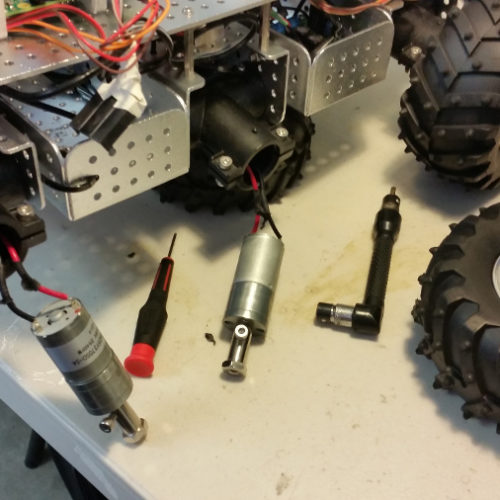
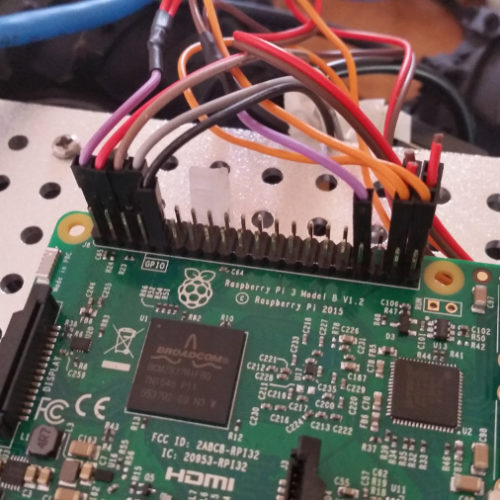
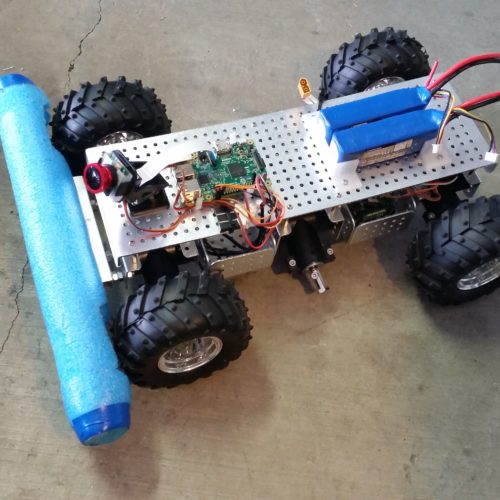
Photo Gallery:

Initial Challenges:
These are the challenges I expected to face before taking on this project (unforeseen challenges are listed further down).
- I have never built a robot of this size.
- I have limited experience used OpenCV, the toolkit used for object detection and tracking from a camera
- I have limited experience with C++ and Python, these two languages will be used in the majority of the robot software stack.
- Learning about the (hundreds of) different ways object detection and tracking can be done with the OpenCV toolkit.
Major Parts List:
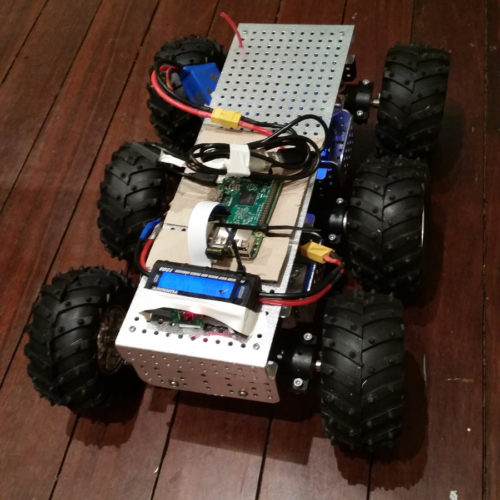
- WildThumper 6 wheel offroad robot chassis: A very nice multi-terrain robot chassis. Easy to attach additional components onto the meccano style frame
- T-Rex Motor Controller: This component tells the 6 wheels which way and how fast to spin
- Raspberry Pi 3: This computer runs the object tracking algorithm, controls the position of the camera and tells the T-Rex motor controller how to move the robot in order to follow the object.
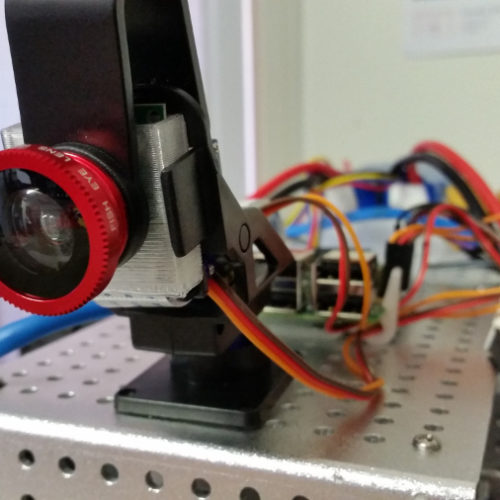
- Raspberry Pi Camera: This is the standard 8MB Raspberry Pi camera. It has a wide angle lense attached. It is sitting ontop of a 2-axis servo camera mount so it can move independently to the robot base.
- Turnigy RC receiver & transmitter: A standard RC setup so the robot can be remote controlled if needed. This can also override the automatic robot mode incase something goes wrong.
- Batteries, Wires and Voltage Regulators: Two 12v lipo batteries which provide power to the Motors, Raspberry Pi, Camera and Camera Servos.
How It Works (Version 1: Object Tracking with C++):
- The robot is positioned in front of the object (person) it wishes to track
- A mobile phone web browser is opened up to an Apache/PHP script running on the Raspberry Pi. This web page takes a camera photo and allows the user to outline the object that needs to be tracked (like a zoom + crop tool).
- This web page also allows the user to set robot configuration variables (max motor speed, camera servo steps, which object tracking algorithm to use, etc..). These settings are stored in memcache on the Pi
- The coordinates of the selected object are passed through to a C++ tracking program (PHP script executes the C++ binary). This program is a fork of the CMT tracking algorithm and makes use of some OpenCV3 features.
- The C++ tracker reads some configuration variables from memcache (such as the camera capture width/height)
- The C++ tracker loads the same still image used by the PHP script, and identifies keypoints within the selected coordinates of that still image. (we use the same still because the frame may have changed between the time the PHP script runs and the C++ app starts). These keypoints are saved and used to track the object in future camera frames.
- The C++ tracker then starts using a low level Raspicam interface to pull raw image data from the camera (much quicker than the default /dev/video OpenCV method)
- The C++ tracker looks for the object in each received camera frame. If the object is found it publishes the coordinates ( bounding box + quality of match ) to the operating system via ZeroMQ
- A python script is listening for ZeroMQ messages. It parses the object coordinates out of the ZeroMQ message to determine how far the object has moved from the previous location. It also works out if the object has moved away (smaller) or come closer (larger) to the camera.
- The python script will move the camera left/right/up/down to center the object within frame.
- If the camera mount moves past a left/right threshold the robot wheels will start moving to center the object.
- If the object size becomes smaller the robot wheels will start moving forward.
- If the object size becomes the same the robot wheels will stop moving.
- If the object size becomes larger the robot wheels will reverse.
- This process repeats many times per second.
How It Works (Version 2: Faster Glyph Tracking):
- The robot is positioned in front of the object it wishes to track. A glyph image is attached to the object.
- A python script running on the robot is constantly looking for glyph images in the frame. If a glyph image is found the coordinates of the object are published to ZeroMQ.
- Another python script is listening for ZeroMQ messages. It parses the object coordinates out of the ZeroMQ message to determine how far the object has moved from the previous location. It also works out if the object has moved away (smaller) or come closer (larger) to the camera.
- The python script will move the camera left/right/up/down to center the object within frame.
- If the camera mount moves past a left/right threshold the robot wheels will start moving to center the object.
- If the object size becomes smaller the robot wheels will start moving forward.
- If the object size becomes the same the robot wheels will stop moving.
- If the object size becomes larger the robot wheels will reverse.
- This process repeats many times per second.
- The Glyph tracking is much faster than the object tracking, and the high contrast nature of glyph images make it perform better in varying lighting conditions.
Progress Videos:
- Basic object tracking is working with a Python script. This Python script can successfully move the robot (left & right only) so the object stays within the center of the video frame:http://youtube.com/watch?v=hvzohGuw8XI
- Here we have attached the 2-axis camera mount so it can track more accurately independently of the robot basehttps://www.youtube.com/watch?v=XmOXFqxpNwU
- Here we have the followbot moving foward and back following a bin:https://www.youtube.com/watch?v=sGqsEOVGPbE
Unforeseen Challenges:
This is a list of unforeseen technical challenges I ran into along the way.
- Large Python learning curve (especially surrounding threads) and compiling C++ issues on the Raspberry Pi. CMake, incompatible libraries on ARM architecture.
- Finding, testing and compiling different “object trackers” was quite time consuming on the low powered Raspberry Pi. It wasn’t possible to test these on my computer before testing on the Pi. The Pi is ARM architecture and a lot of the trackers work differently (or not at all) compared to how they run on normal Intel PC architecture. This involved a lot of downloading scripts and waiting for things to compile before testing on the Raspberry Pi.
- There is no good resource with a list of all available OpenCV object trackers and example source code. This makes me want to start an offshoot project to collect and showcase all available object trackers (along with sample videos so the quality of each tracker can be seen)
- Finding a reliable way to communicate settings and object tracking coordinates between PHP, Python and C++ on the Raspberry Pi. Ended up with memcache and ZeroMQ (still have minor issues but it works).
- Started with slower Pi2 before upgrading to Pi3. The Pi2 operating system I used (Ubuntu) was not yet compatible with Pi3, so I had to scrap that image and build a new one based on Raspbian.
- Pi3 change the serial port and has a bug with serial write speed, this produced some very undesirable results while testing (robot zooming around in circles at top speed)
- The tracker can take up to ½ second between the time it takes a camera frame, detects the object and starts to tell the camera/robot to move. The tracked object may have moved already by the time this happens. Resulting in a back/forward war between the real object position and the position it thinks the object is in.
Other possible projects to create from this:
- Start a website to showcase all available object trackers. Along with statistics and example videos showing the quality of each available tracker. Source code and examples for trackers would be available as well. Having access to something like this would have shaved months off this project development time.
- Connect a Google Cardboard VR system to the camera 2-axis mount, so you can look around as you drive the robot in manual mode.